Tuesday, July 7, 2015

A Radish Trio to Share

I always grow radishes. Now that I think of it, I've been growing them for about 10 years. For many years I grew what ever package Canadian Tire had on sale or the dollar store sold - mostly Cherry Belle or Easter Egg. I wouldn't call myself a massive radish fan - often I'm not exactly sure if they actually taste good or where I should use them in my cooking. However after a few years of experimentation they've grown on me. Here is a quick list of some actually yummy uses for radish from your garden.

8 Quick Ways with Radishes

1) Thinly sliced accompanied with cream cheese or goat cheese on Melba toasts
2) Chopped into any coleslaw
3) Sliced and pickled alongside baby carrots and cucumbers (or simply alone)
4) Finely diced into tuna or egg salad
5) Finely diced into devilled eggs
6) Quartered and baked with butter and fresh herbs
7) A pretty garnish - on anything. (See stunning examples below)
8) Raw with a nice ranch dip - or any dip of your liking.

Thinly shaved into perfect coils of itself, patience and practice.
(Photo from Google Search)
Adorable stars made from the tip of a pink radish.
I can imagine them poking out of a vegetable tray.
(Photo from Google Search)
Feeling cute and keen - tiny radish toadstools as a garnish or decor.
(Photo from Google Search)
After getting over the taste of radishes - that watery, earthy, tingly spice, crunchy (sometimes nutty) profile, you realize there is much more to these quick growing root vegetables. Colour. Wither it's finely chopped, or sliced, it adds edible bright colour to your dish.

This year I'm growing the following radishes - Sparkler, Red Head, Pink Celebration, Watermelon (Red Meat), Malaga, Pink Beauty and Bora King. Yes that's a lot, I know. The seeds save well over a few seasons and they all seem to mature at different times.

First to ripen this year are simple gorgeous! Malaga, Sparkler and Pink Beauty! All of these radishes could get larger, but in the process of thinning I removed these small tender guys for munching.

Malaga Radishes from Baker Creek Heirloom Seeds. Dark purple, slightly sweet
and even the leaves display some faint purple veining and purple in the stalks. When cut the
true purple colour leaches onto the cutting board and onto the white flesh of this radish.
Some very pink, Pink Beauty radishes! Very crisp and mildly spicy!
An old classic, Sparkler radish, traditional in every way.
Texture and flavour always very consistent.
All of them together, look at that bundle! Wow!
I sliced them up and made lovely cream cheese canapés!
Bonus awesomeness - the chickens love those spiky radish greens from harvest and thinning!

Tuesday, May 12, 2015

Quail Full Circle!

Just over a year ago I blogged about my dream to own quail alongside my chickens at the Suburban Mirco-farm. Last fall the dream came true! I picked up 7 adult quail and right away I had an abundance of eggs and cute little sounds were heard coming from the coop. I soon discovered I had 2 males and 5 females. I quickly found quail very easy to keep, extremely productive and of course adorable! Each quail hen was laying an egg each for weeks straight!

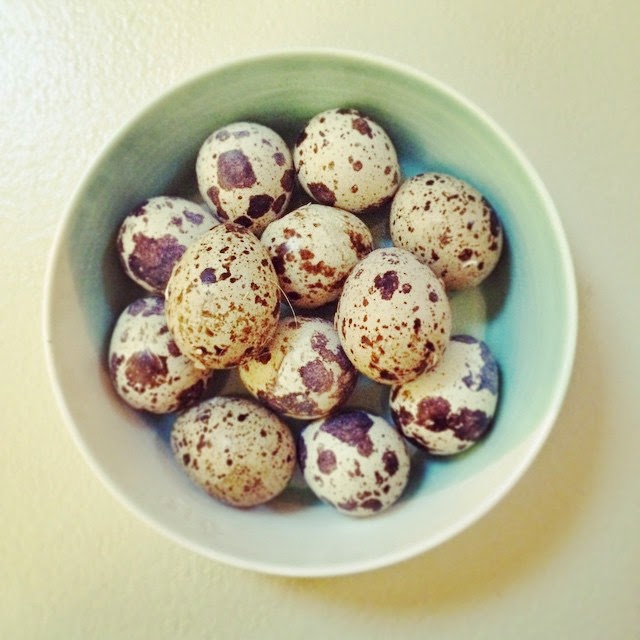
The first big clutch of quail eggs collected over a week -
adorably speckled with large orange yolks!

The "First egg" alongside my chicken eggs for size and
colour comparison!
Quail are maybe, not "as" glamorous as I had originally imagined, but that's like anything you're trying for the first time in the garden or with livestock. They are about as easy as rabbits or guinea pigs - litter changes, fresh water and food daily, small leafy greens and egg collection. It's also important to gently handle your quail to check body condition, nails and beaks. I found that the males were rather aggressively breeding and creating some small balding spots.

One of the female Coturnix quail - this colour is called "Golden Italian" or "Gold Tibetan"
The winter in Ontario was very cold and harsh this year, and I lost 3 quail to what I believe to be weather related stress, and personal failure on my part. Especially sad because I lost a beautiful white male, with a small brown bow tie on his chest. Lesson's learned - seal the quail from drafts - insulate better. Despite my drop to only three females, the eggs kept pouring in! It's important to note that quail lay all over the coop, not in nests - so accessibility is important, as well as a cleaner bedding.


As some of the younger quail started laying and the speckled egg colour really started to vary - from large dark speckles to lighter with more delicate speckles. Also- for those who noticed my pink porcelain egg tray - it was from Target store-closing clearance sale! I also have two white more traditional trays for chicken eggs! Easy to wash and perfect for counter-top display, reusable and sustainable!
Baskets are also picture-esk! Note; the olive toned egg, bloom and variation.
Note the title of this blog post - Full Circle. Well, I have my quail, I have a male and three females, what does a girl with 5 incubators do? She collects 23 eggs and bakes them for 16 days at 99.5F, and voila! New baby quail! Some of my eggs were infertile -  but I still got quite a few chicks! They are about the third the size of a chicken chick! Now, enjoy some quail-chick-pics!

Some interesting colour variations! Excited to see how they'll fledge out!

Eyebrows or no eyebrows? Cute or cute?

Don't I look fantastic in the Scotch Heather? A very alternative spring picture!
 I'm excited for the next generation of backyard Suburban quail - and so far a very pleasant experience! Next steps are an outdoor quail tractor and bringing in some fresh bloodlines for more breeding! Coturnix quail come in so many colours!

Sunday, April 19, 2015

Planting a bit of everything!

I spent a few days last week prepping and planting various seeds in 8 additional trays - and I've hit that point where I say to myself "Wow, this is a lot of stuff, but I still need more!". Ideally I don't like to run out to the garden centre for your basic edibles, so starting them on time and making the most of early planting is important. If you plan on actually producing enough vegetables to supplement your grocery bill, you have to do some plant math - How much do I think I need, and then add extras.
Re-organized my seed bin, yet again, I found that my other systems
didn't really help me find what I needed fast enough. Now I sort
by family group or even species depending on how many I have of each.
Much of this math is something you will learn after each season, compounding facts and experiences to get an idea of your needs and also your ability to maintain the size of garden you attempted.

Zucchini for example; How much do you really need? Most families only need one or two plants depending on your actual zucchini preference and willingness to cook it regularly during it's peak production. Then you'll see people giving zucchini away by the bushel! Without growing zucchini before, you might not know that they are heavy producers and each variety has an optimal harvest period. You can eat and deep fry blossoms à la gourmond to slow the production of more fruit. Last year I didn't grow enough - which is bizarre for me, because I almost always go overboard. Zucchini is so versatile, used in so many dishes, I would often run out during the week and have nothing left over for freezing. Any and all zucchini unused for meals during the summer - would be shredded, bagged and frozen. I used my frozen zucchini in loafs, muffins, soups, stews, pasta sauces and lasagna. By the time November came around I was basically out of my zucchini reserves - not a good prepper if you ask me. I'm not making this mistake this year - 7 varieties later and a plant of each started!


 I buy my supplies as I need them or when I find them cheap in stores - I know the ethics of the dollar-store are questionable, but when I find exactly what I need for less then in garden centres, I have to jump on it. For example; I wrote last year about those mini-jiffy pellet trays and they work wonders, I even use them in my classroom! This year I found cell packs for 3/$1.00 and half width "windowsill" trays with 16 sections that fit perfectly beside my regular sized trays on my planting rack. I spent probably 6$-7$ on trays and cell packs. Additionally maybe 5$ on seed starting soil from Canadian Tire. The most amazing part is that I know people spend less on these supplies - but for under $15.00 I can't complain! Especially considering I always recycle most of my new material for the next year and just replace what needs to be replaced and expand as I need to. Buying even a few started seedling can really add up.

6 - 12 cell packs from the Dollar-store fit easily in your basic $1.00 tray from Canadian Tire
One thing I wanted to make sure I did was start at least two or more entire trays of beneficial flowers - nasturtiums, caldendula and marigolds - all of which are edible. Stay tuned for more on these flowers in an upcoming post. I started almost all of my brassicas, including; kales, cabbages, brussels sprouts, broccoli and collards. I also planted a few herbs and my summer squash and a few more flowers.

Peppers coming along nicely - at this stage I can definitely see a difference in the varieties growth rate - Yellow Monster taking the lead with height and leaf size - Cuban hot peppers coming in last with a shorter more compact growth.
First taste of sunlight when the temperature hit +22C outside last week.
Unfortunately they got a bit cold damages when I put them out to early in
the morning and it was still only +3C. 
Freshly started herbs and Amaranth!
Calendula seeds - I bought a mix from Wild Garden Seeds "Flashback Mix"
The tomato grafting project is still a go and I'm excited to see what happens - more seeds starting this week and some infrastructure building expected - as the temperature is dropping back down this week and I don't want to risk killing off direct-sow seedlings. Ah, Canada in the spring.