Ive've been wanting to make a spherical hanging planter for a while, and when I found some coco fibre and metal hangers at the dollar store for 2$ I had what I needed. My concept quickly evolved into a floral upside down tomato sphere - why not!
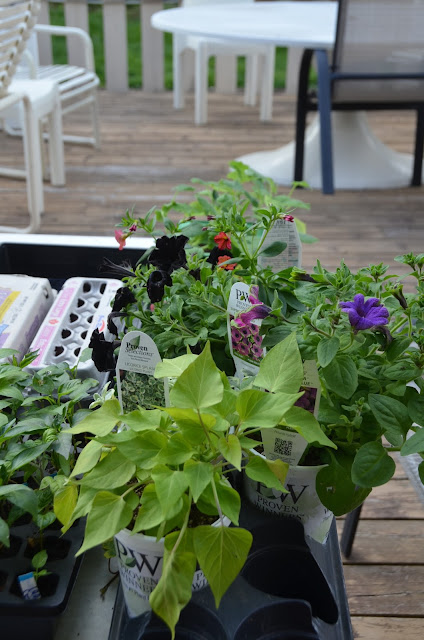
I picked up some "Proven Winners" from Jade Gardens on my annual greenhouse hop, should be an interesting mix of colour. I think anything that can thrive in a hanging basket will do well here. I'm not trying to promo Proven Winners, but they do have some very interesting new varieties of superbells, petunia, petunia hybrids and foliage plants this year. I know that more planters and hanging basket design convention would tell you; thrill, fill and spill, but for a sphere you want mostly fill and spill - who likes rules anyways.
Supplies you'll need:
2 wire hanging baskets with chains and hooks
coco fibre or fibre hanging basket liners (my baskets came with some)
moisture locking soil and or compost
"zip" ties or electrical ties (try to match the colour of your basket wires)
serrated knife
plants
Getting started you'll need two identical hanging baskets with coco fibre liners, thin enough to cut through later. My baskets came with chain and hooks for hanging. I spaced one of the chains to support "the top" basket upside-down, save the other chain for extra support or to lengthen the chain.
Fill the halves with a moisture locking soil or compost, I used a bit of recycled planter soil with moisture lock and compost from my garden, moisture in the case is more important then weight. Wet both sides so that the soil stays in place when you bring the halves together.
Sandwich both sides together, leave one side on top of the other, go around the edge to make sure the coco fibre is sealed around the edges. If they are not sealed, soil will spill out each time you water.
Go around the edges and attach the zip-ties, I used one every few inches, putting lots and lots around the outside isn't super necessary, but it is the support for the bottom half. Luckily I was able to clip the hanging chains around both the top and bottom wire halves for extra strength. Leave the zip-ties long - trust me!
Hang up your new sphere planter and check for weaknesses. I left the zip-tie ends long so that up against a wall or corner like mine (shown above) they act as a guard against the planter swinging around and hitting the wall. Like any planter, you need to think about placement, a round planter once established cannot be placed on the ground in the event of strong winds and stormy weather. Consider anchoring the base with chain or string to the ground to stabilize it if needed. I left the back long zip-ties on and cut away the others just before planting.
Imagine your plant placement before you start cutting holes, you don't want extra drainage as the coco fibre is porous as is. Take a serrated knife and cut a slot for your first plant. Do not remove any coco fibre, leaving a slot will help support each plant and keep the soil and roots inside. When putting your plant in shake off any extra dirt and break up the roots a bit, this will help you fit the plant ion the slot. I added all my plants as the ball was hanging to avoid crushing plants on one side. Be mind-full and leave the back side or "side most likely to be abused" free of delicate plants. Your tomato should go directly at the bottom, only make a small slit and carefully place it as far into the space as it will go. I placed one plant right at the top and the majority of the plants around the equator, creeping and spilling plants on the bottom half. I placed the ivy near the bottom and I hope to see it trail down almost to the ground, I could also train them up the chain. Above I have a hummingbird feeder, I can't wait for it to fill in!
Tips & Things I would do to improve:
1) Use smaller annual plants - from 6 pack cells or 3" pots, this will make it easier to fit plants inside the coco fibre and do less damage to the plant it's self. I used larger plants and struggled to "gently" add plants to the slots I made. I would also get more plants for a fuller look.
2) Use heavy duty zip-ties. My medium sized ones seem to be fine, but I think larger ones (and in black to match the frame) would stand up just a bit more.
3) I should have bought more hanging baskets! I loved this DIY and now I have so many ideas, like a tomato herb sphere, strawberries, perennial sphere and more! I think I need to go out looking for more! Ouuu! What about a butterfly ball!
Plants Used:
Petunia Picasso "Blue" Petunia Hybrid
Petunia Picasso "Pretty Much Picasso" Petunia Hybrid
Petunia "Phantom"
Superbells "Dreamsicle"
Superbells "Coralberry Punch"
Lime Green Sweet Potato Vine
Variegated Ivy
Variegated Licorice Plant
Tomato "Variegated"
Total DIY Cost:
Hanging Baskets with Liners - 4$
Zip-ties - 1$
Soil - Free
Plants - 10$
Total: 15$
20 mins to make it yourself
(Plus the wire hanging baskets can be used again next year)


No comments:
Post a Comment